- Home
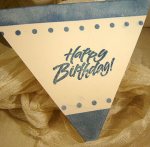
- Birthday Cards
- Basic Blank Card
Making A Basic Blank Card
First Thing First In Card Making.
Let's begin our card making experience by making a basic blank card.
Whatever you want to make, whether a bigger than normal card, a notecard, or just a simple standard card, the process is still the same.
A blank card is the piece of card surface that you will draw, stamp, paint or embellish on. It should be sturdy enough to take the weight of your artwork. Usually I like to work on 200gsm -250gsm art-cards.
P.S. Artcards are white cardstock. The colourful ones are usually referred to as Fancy Paper or Cardstock.
If you purchased ready cut paper from the craft stores, they usually come in A4 sizes (210mm x 297mm). You can just fold it in half and that's your blank card. Or you can cut it into two halves and fold them and you have two smaller cards.

Please note that paper has grain. Take a piece of paper and try lightly bending it in each direction. You will notice that it bends easily in one direction. That is the direction you need to fold your card - parallel to the grain and not against the grain of the paper.
If you fold against the grain with bulky paper, you will meet resistance and the fold will be rather ugly and messy. Some paper might break and you will notice some strands of fibre sticking out. But with the paper weight that we are using and the size of the basic card, this is not much of a problem whether along the grain or against the grain. As long as the handmade card can stand up without becoming buckled under the weight of your artwork, it should be fine.

Card Making Tip #1

Make a batch of these blank cards at one time and keep them at hand which is what I normally do. And when you have an idea or when inspiration strikes, you can start to create your masterpiece immediately.
Folding Your Basic Blank Card
- Measure where you want to fold your card, i.e. the middle of the card, so just mark the two points on each end lightly with a pencil.
- Place your metal ruler along the two points
- Using your bone folder, firmly score a line along the pencil marks.
- Fold along the scored line and you will get a crisp clean fold.
Remember to erase the pencil marks.
Card Making Tip #2
Keep your basic blank cards in one specific place so you know where to find them when you need them:~D.
Check out my Oh Happy Birthday website for more card ideas.
Like This Site?
|
| |
Celebrating Creativity! Connecting Lives!
~ bringing cheer one card at a time.
Help Me Get The Word Out

If you like making greeting cards and want to encourage others to do so because of its many benefits, please help me share this website with your friends. Just click on the share buttons below to share with your fans and friends. Thank you for sharing the good things in life :-)

Hi! Welcome to my card-making website. My name is Flora and I'm an avid crafter and love creating stuff with paper.
I love to connect with you so do sign up for my e-newsletter which is totally free and receive fresh news every month.
Recent Articles
-
Shaped Birthday Greeting Cards Are So Fun and Unique
Aug 01, 23 01:41 AM
 Let's make Birthday greeting cards in various shapes. Why just a regular card? Make it fun with all kinds of shapes for your diy birthday cards or invitation cards. These birthday fun cards are great…
 -
Cards Verses for Your Greeting Cards
May 15, 23 05:10 AM
 List of cards verses for all occasions. Need words, quotes or poems? Free wordings to use for your greeting cards.
 -
Heartfelt Birthday Wishes for Friends and Family
May 15, 23 05:04 AM
 Birthday wishes for friends and family to include in your birthday cards.
 -
Other Card Makers And Their Handmade Cards
Oct 08, 21 01:16 AM
So many card makers have sent in their handmade cards. View their creations and be inspired by their card making style and techniques. -
Barbara Phelps 4 - Fourth Page of Handmade Cards
Oct 08, 21 12:04 AM
 Barbara Phelps 4 is the fourth page of beautiful handmade cards personally created by Barb, a creative crafter and reader of this card-making site.
My Other Websites
Copyright © 2004-2023 Flora Tan | Making-Greeting-Cards.com (aka HeartInCard.com ) | All rights reserved.
Making-Greeting-Cards.com has affiliate partnerships and may earn commission on products purchased through affiliate links. These partnerships do not influence our editorial content. Making-Greeting-Cards.com does not sell any personal information.
New! Comments
Have your say about what you just read! Leave me a comment in the box below.