- Home
- Birthday Cards
- Handmade Background Paper
Handmade Background Paper
D.I.Y. handmade background paper are unique and are easy to create.
Make as many as you like or just one to incorporate into your card as a background layer like what I did as shown on the image immediately below.

The above lace background design was done using a lace curtain placed over a sheet of A4 white card-stock and sprayed with Tattered Angels's Glimmer Mist, a water-based coloured ink.
If you don't have Glimmer Mist, you can also mix a spray bottle of watercolour or poster colour with water. Try out the colour intensity on a piece of scrap card or paper first. Add more ink if the colour is not strong enough.
Share well before spraying onto the lace covered card-stock. Make sure all area are covered with the colour then lift up the lace and see the magic. Leave the card to be dried before touching the sprayed surface.
Wash lace curtain immediately. My lace is clean and white without any stain after hand washing.
More Handmade Background Paper
And here are more ways to make background paper for your card-making
Instead of buying those designer paper, try this. These could save you some money for other card making's tools.
You could also use these handmade background paper to wrap small gifts.
Notes: I did these handmade background papers in a sketch book I bought from the art shop. But you can do yours on any thicker than 100 gsm plain white paper.
Pink And Orange Dragonflies Background Paper

Supplies Needed:
1. Plain paper
2. Dragonfly rubber stamp (Stamp Credit: Magenta Rubber Stamp)
3. ZIG Dotta Riffic markers (Baby Pink & Apricot)
4. Brilliance Inkpads ( Pearlescent Orchid & Pearlescent Orange)
Instructions:
1. Ink dragonfly stamp with the Pearlescent Orchid inkpad and stamp randomly all over the plain paper. Leave spaces enough to stamp the orange colored dragonflies.
2. Ink dragonfly stamp with the Pearlescent Orange inkpad and stamp in the remaining empty spaces.
3. Use the ZIG Dotta Riffic markers to draw dots.
Tips: I love to use the ZIG dotta Riffic markers and I used them often. Many times, I used them to cover up mistakes. Like when I stamped the dragonflies for this background paper, I spaced the dragonflies too far apart and the whole background looks kind of empty and incomplete. So Dotta Riffic markers came to the rescue. ;~D
Rose Background Paper

Supplies Needed:
1. Plain Paper
2. Rose Rubber Stamp (Stamp Credit: Magenta Rubber Stamp)
3. Brilliance Inkpad (Pearlescent Beige)
Instructions:
1. Ink rose rubber stamp with Pearlescent Beige inkpad.
2. Stamp randomly all over the plain white paper.
Tips: Try stamping with other ink colors. Or use a different design stamp.

Supplies Needed:
1. Plain paper
2. Heart rubber stamp (Stamp Credit: Unknown)
3. ZIG Dotta Riffic markers (Pure Red)
4. Brilliance Inkpad ( Rocket Red)
Instructions:
1. Ink heart stamp with the Brilliance Rocket Red inkpad and stamp randomly all over the plain paper.
2. Use the ZIG Dotta Riffic marker to draw dots in-between the stamped hearts.
Making Greeting Cards › D.I.Y. Craft Supplies › Here
Making Greeting Cards › Card-making Supplies › Paper & Card-stock › Here
Like This Site?
|
| |
Celebrating Creativity! Connecting Lives!
~ bringing cheer one card at a time.
Help Me Get The Word Out
If you like making greeting cards and want to encourage others to do so because of its many benefits, please help me share this website with your friends. Just click on the share buttons below to share with your fans and friends. Thank you for sharing the good things in life :-)

Hi! Welcome to my card-making website. My name is Flora and I'm an avid crafter and love creating stuff with paper.
I love to connect with you so do sign up for my e-newsletter which is totally free and receive fresh news every month.


Recent Articles
-
Shaped Birthday Greeting Cards Are So Fun and Unique
Aug 01, 23 01:41 AM
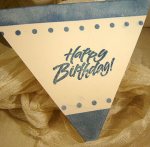 Let's make Birthday greeting cards in various shapes. Why just a regular card? Make it fun with all kinds of shapes for your diy birthday cards or invitation cards. These birthday fun cards are great…
 -
Cards Verses for Your Greeting Cards
May 15, 23 05:10 AM
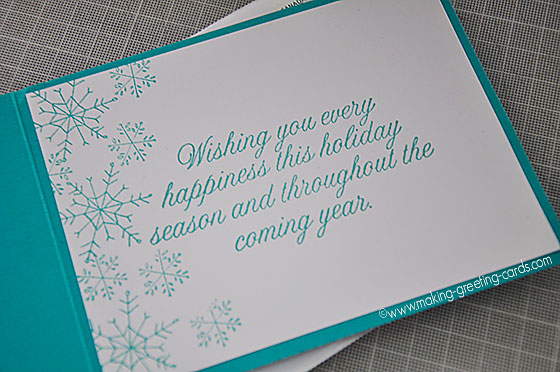 List of cards verses for all occasions. Need words, quotes or poems? Free wordings to use for your greeting cards.
 -
Heartfelt Birthday Wishes for Friends and Family
May 15, 23 05:04 AM
 Birthday wishes for friends and family to include in your birthday cards.
 -
Other Card Makers And Their Handmade Cards
Oct 08, 21 01:16 AM
So many card makers have sent in their handmade cards. View their creations and be inspired by their card making style and techniques. -
Barbara Phelps 4 - Fourth Page of Handmade Cards
Oct 08, 21 12:04 AM
 Barbara Phelps 4 is the fourth page of beautiful handmade cards personally created by Barb, a creative crafter and reader of this card-making site.
My Other Websites
Copyright © 2004-2023 Flora Tan | Making-Greeting-Cards.com (aka HeartInCard.com ) | All rights reserved.
Making-Greeting-Cards.com has affiliate partnerships and may earn commission on products purchased through affiliate links. These partnerships do not influence our editorial content. Making-Greeting-Cards.com does not sell any personal information.
New! Comments
Have your say about what you just read! Leave me a comment in the box below.