- Home
- Birthday Cards
- 50th Birthday Card
50th Birthday Cards
Celebrating 50 years of life
50th birthday cards can be stunning and sensational. Actually, who said you can't be that at 50?
Well, it has finally arrived for someone to celebrate the BIG 'Five-O'. It's time to celebrate with him or her at this huge milestone. So let's send a fabulous Happy Birthday Card and let the 50th birthday guy or gal know how special and amazing he/she is.

Reaching 50 doesn't mean you are over the hill and on the way down. It's apt time to celebrate achievement and look forward to greater achievements. I just love the Red Hats Society's philosophy of growing old. A time to wear red hat, red robe and go out and have a birthday bash. How cool is that! Check out some of my Red Hats Cards.
Yes, this is the time to go out and celebrate with friends because it's definitely the beginning of a new chapter in your life.
Below is a birthday card created by a reader, Arosha Ranaweera.
50th Birthday Wishes
by Arosha Ranaweera (Kelaniya, Sri Lanka)

Arosha said: "I made this card for my Father for his 50th birthday. I used A4 paper and glitter."
What a lovely handmade birthday card! So much effort put into making this colourful card! I'm sure your father will love and treasure it always, Arosha.
Handmade 50th Birthday Cards
And here's one example of a homemade 50th birthday card I have created with the two big numbers. Like Arosha, I also used bright colours to depict happy celebration and great joy.

Below are the items needed to make this birthday card followed by the step-by-step instructions.
Cardmaking Supplies Used:
- Black or red color cardstock 12" x 6"
- Turquoise color textured card with adhesive 2.25" x 6"
- Rusty red color textured card with adhesive 3.75" x 6"
- Turquoise and rusty-red color textured cardstocks
- White color cardstock
- Number clear stamps by Hero Arts
- Fabulous word clear stamp by Hero Arts
- Kiss word stamp by Hero Arts
- Flourishes clear stamp by Hero Arts
- scissors
- Black color pigment ink pad
- Yellow ink pad
- Clear embossing powder
- Heat gun
- Acrylic block
- Glue or double-sided tape
- Red with black edges ribbon 4.5" length
Cardmaking Directions:
- Fold black or red color cardstock to make a blank 6" x 6" square folded card
- Stamp flourishes with black ink on turquoise and rusty red cards
- Paste turquoise color card to the bottom of the card front.
- Paste rusty-red color card to the top of the card front flushed to turquoise card.
- Stamp '50', 'FABULOUS' and 'kiss' in black pigment ink on the white cardstock.
- Pour clear embossing powder on image and shake off excess.
- Before heating with heat gun, tidy strayed powder with small brush.
- Trim the stamped images. Cut off the k and s in 'kiss' and discard.
- The two numbers should be trimmed closed to the outlines.
- Tie ribbon around the right side of the number 0.
- Layer numbers to turquoise and rusty-red scrap cardstock.
- Co-ordinate the colors - card front: top rusty-red to number turquoise.
- Glue, trim a border and glue again to the card front.
- Make sure the colors are aligned.
- Layer FABULOUS to rusty red card and 'is' to turquoise card.
- Paste both onto the card front.
- View above 50th birthday card for placement.
That's it! A stunning rusty red and turquoise 50th card to bring birthday greetings to someone dear. You can make any 50th birthday cards sensational. Try other designs. Make these cards bright, cheerful and uplifting.
The same design can be used for other birthday cards too. For example, 40th, 60th and so on. Be creative! Change the color combinations, use different stamp images, cliparts, different placements and embellishments. And you got a totally different kind of card design.
Talking about embellishments. Because of the popularity of scrapbooking, we, cardmakers, have lots of scrapbooking embellishments to choose from to decorate our homemade cards.
I will be adding more examples of these cards so do bookmark this website to see the new handmade greeting cards.
And if you would like to view my whole collection of Happy Birthday Cards, I invite you to go to OhHappyBirthday.com where I dedicated a whole website to celebrating birthdays.
Card-making Tips
- Clean clear stamp immediately with dish washing detergent after use. For stubborn stain, use a dish cloth to rub off the ink stains.
- Use clear embossing powder on colored stamped images. If you missed any stray powder, it's not noticeble.
- Click here to read more card making tips.
You might like these
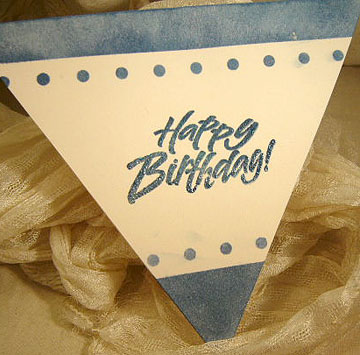
Shaped Birthday Greeting Cards Are So Fun and Unique
Let's make Birthday greeting cards in various shapes. Why just a regular card? Make it fun with all kinds of shapes for your diy birthday cards or invitation cards. These birthday fun cards are great birthday card ideas.
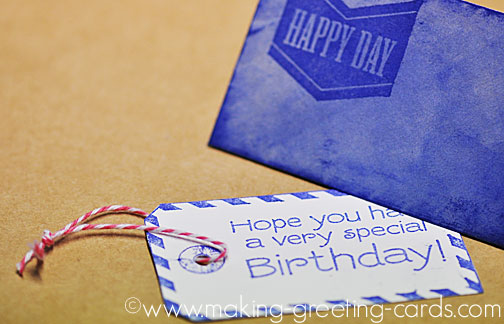
Happy Day Birthday Note Card
Birthday note card with matching decorated envelope.
Kids Birthday Cards
Kids Birthday Cards : Help Your Children Make Their Own Fun Greeting Cards.

Share Your Thoughts About These Cards Or Article
Like This Site?
|
| |
Celebrating Creativity! Connecting Lives!
~ bringing cheer one card at a time.
Help Me Get The Word Out
If you like making greeting cards and want to encourage others to do so because of its many benefits, please help me share this website with your friends. Just click on the share buttons below to share with your fans and friends. Thank you for sharing the good things in life :-)

Hi! Welcome to my card-making website. My name is Flora Grace and I'm an avid crafter and love creating stuff with paper.
I love to connect with you so do sign up for my e-newsletter which is totally free and receive fresh news every month.
Recent Articles
-
Shaped Birthday Greeting Cards Are So Fun and Unique
Aug 01, 23 01:41 AM
 Let's make Birthday greeting cards in various shapes. Why just a regular card? Make it fun with all kinds of shapes for your diy birthday cards or invitation cards. These birthday fun cards are great…
 -
Cards Verses for Your Greeting Cards
May 15, 23 05:10 AM
 List of cards verses for all occasions. Need words, quotes or poems? Free wordings to use for your greeting cards.
 -
Heartfelt Birthday Wishes for Friends and Family
May 15, 23 05:04 AM
 Birthday wishes for friends and family to include in your birthday cards.
 -
Other Card Makers And Their Handmade Cards
Oct 08, 21 01:16 AM
So many card makers have sent in their handmade cards. View their creations and be inspired by their card making style and techniques. -
Barbara Phelps 4 - Fourth Page of Handmade Cards
Oct 08, 21 12:04 AM
 Barbara Phelps 4 is the fourth page of beautiful handmade cards personally created by Barb, a creative crafter and reader of this card-making site.

My Other Websites
Copyright © 2004-2024 Flora Grace | Making-Greeting-Cards.com (aka HeartInCard.com ) | All rights reserved.
Making-Greeting-Cards.com has affiliate partnerships and may earn commission on products purchased through affiliate links. These partnerships do not influence our editorial content. Making-Greeting-Cards.com does not sell any personal information.
New! Comments
Have your say about what you just read! Leave me a comment in the box below.