- Home
- Birthday Cards
- Easter Greeting Card
Happy Easter Greeting Card
In The Shape Of An Egg
Homemade Easter greeting card in the shape of an egg which opens out to reveal a cute little chick.
Yes! It's time to celebrate Easter. Why not make a few of these easter egg greetings and send them to surprise friends and relatives.
I'm sure they will love it. This greeting card design is simple to make. Just follow the free printable template that I have provided and you should not have any problem duplicating it.
You can make this card with kids too. They will love to color the egg and chick. And it's okay if they color outside the line because you are going to trim around the pattern anyway.
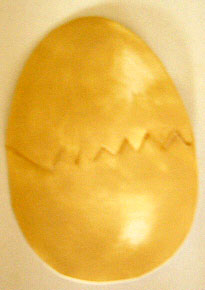
This is the front of the easter egg. I used skin color tone ink from a ink pad to color it and leave some white spaces to give a 3D effect.
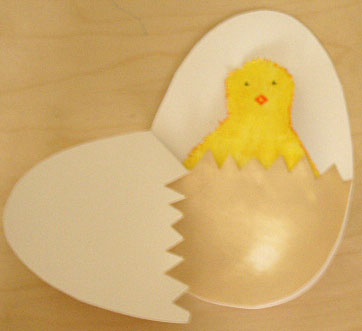
This is how it looks when you open the top half of the egg.
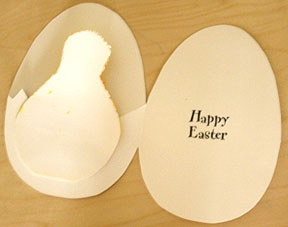
Here's how the inside looks like.
And here's the step by step instructions for making this card. The free printable template for this card can be downloaded by clicking here. (Note: You will need Adobe Reader v.5 and above to view this file. Download Free Adobe Reader.)
Easter Greeting Card Making Supplies:
- White cardstock
- Inkpads : skin tone color and black color
- Happy Easter greetings rubber stamp
- Color Marker: yellow, orange, and black
- Scissors
- Double-sided tape
- Lightbox
Easter Greeting Card Making Instructions:
- Print out the Easter Card Template on white photocopy paper.
- Fold the white cardstock.
- Place template on the cardstock with the left fold line flush to fold of your cardstock.
- Transfer the design onto your white cardstock with lightbox. (If you don't have a lightbox, just use a pencil and shade the back of the template. Put the template face up onto your cardstock and go over the outline with a pencil. The image will be transfer over to your cardstock.)
- Color the front of the egg with skin tone color ink or paint.
- Transfer the design for the chick onto another white cardstock.
- Color the chick with yellow marker.
- Draw in the eyes with black marker and the beak with orange marker.
- Cut out the egg card. (Note: Do not cut on the fold lines)
- Cut the jagged middle of the egg until fold line.
- Cut the chick and snip on the edges.
- Attach the chick to the back of the bottom half of the cracked egg with double sided tape.
- Finally, ink Happy Easter rubber stamp and stamp the message on the inside of the card.
More Happy Easter Cards
Like This Site?
|
| |
Celebrating Creativity! Connecting Lives!
~ bringing cheer one card at a time.
Help Me Get The Word Out

If you like making greeting cards and want to encourage others to do so because of its many benefits, please help me share this website with your friends. Just click on the share buttons below to share with your fans and friends. Thank you for sharing the good things in life :-)

New! Comments
Have your say about what you just read! Leave me a comment in the box below.