- Home
- Birthday Cards
- Envelopes
Decorating Envelopes Explained
Nowadays, envelopes come in many different sizes, beside the standard sizes. I like to make cards that can fit into a standard size one but there are occasions when I felt more creative and created a non-standard size or shape card. Then I will have to make my own which is very simple and can be done in a snap.

Note: Do make sure that you don't decorate too close to the address area as well as the bottom portion since this might cause some delay in the delivery of your mails.
Click here to learn how to make them yourself.
Turning Your Envelopes into Works of Art
 Back Design
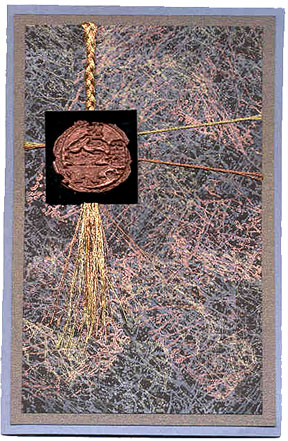
 Design on the Back
When I first started out making greeting cards, I participated in many swaps and exchanges locally as well as internationally. It was fun to receive handmade greeting cards in my mailbox. Swappers not only handmade beautiful greetings cards, tags and trading cards, but also decorated the boxes, bubbled packed pockets and whatever they used to post their masterpieces in.
What a joy it was to receive those mails!
Below are the many different ways you can brighten up your mails.
- Decorate them with rubber stamp images.
- Give them a tea or coffee wash to achieve a antique look.
- Decorate with punch-arts.
- Use decorative scissors to trim the flaps.
- Dry embossed on them.
- Blow coloured bubbles on them.
- Use stickers.
- Use stencils.
- Ink your rubber stamp using a Versamark inkpad and randomly stamp all over to give a watermark look.
- Write the address with calligraphy. Brush calligraphy is the rage now.
Anyway, just make your marks!
Some of the Methods Explained
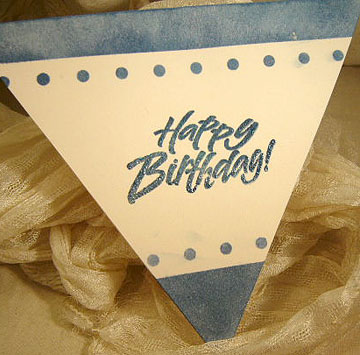
 Pretty Design Idea
I wish I am able to explain in more detail the various ways you can create this kind of arts. But here are some from the above list. Hope this will help to inspire you to start decorating yours every time you make and send out your cards; be it Christmas cards or a Happy Birthday greetings.
Rubber Stamping
Stamp a frame around the address of the recipient or a image on the left just beside the address portion.
Tea or Coffee Wash
After making your tea or coffee, do not throw away the used coffee residues or tea leaves or bags. Take them out before sweetening your beverages. Add hot water and let it steep a while in the water. I usually leave it overnight. Or if you want a stronger stain, use fresh leaves or bag.
Use a brush and do a wash on the surface of the envelope where you desire. You can also apply some on the bottom of a mug and place it on a corner for a tea or coffee stain look.
Blow Colour Bubbles
This is real fun. What you need is a straw, dish detergent and coloured water. Mix one or two colours in containers. Containers should be big enough for the front or back to catch the bubbles. Blow the coloured water with the straw to form bubbles and place the portion where you want to be decorated over the bubbles and the blown bubbles will leave coloured marks on it. When dry, repeat with another colour if desired.
Check out this site for their yearly contest.
Making Greeting Cards! › Card Making Supplies › Envelopes
Like This Site?
|
| |
Celebrating Creativity! Connecting Lives!
~ bringing cheer one card at a time.
Help Me Get The Word Out
If you like making greeting cards and want to encourage others to do so because of its many benefits, please help me share this website with your friends. Just click on the share buttons below to share with your fans and friends. Thank you for sharing the good things in life :-)

Hi! Welcome to my card-making website. My name is Flora Grace and I'm an avid crafter and love creating stuff with paper.
I love to connect with you so do sign up for my e-newsletter which is totally free and receive fresh news every month.
Recent Articles
-
Shaped Birthday Greeting Cards Are So Fun and Unique
Aug 01, 23 01:41 AM
 Let's make Birthday greeting cards in various shapes. Why just a regular card? Make it fun with all kinds of shapes for your diy birthday cards or invitation cards. These birthday fun cards are great…
 -
Cards Verses for Your Greeting Cards
May 15, 23 05:10 AM
 List of cards verses for all occasions. Need words, quotes or poems? Free wordings to use for your greeting cards.
 -
Heartfelt Birthday Wishes for Friends and Family
May 15, 23 05:04 AM
 Birthday wishes for friends and family to include in your birthday cards.
 -
Other Card Makers And Their Handmade Cards
Oct 08, 21 01:16 AM
So many card makers have sent in their handmade cards. View their creations and be inspired by their card making style and techniques. -
Barbara Phelps 4 - Fourth Page of Handmade Cards
Oct 08, 21 12:04 AM
 Barbara Phelps 4 is the fourth page of beautiful handmade cards personally created by Barb, a creative crafter and reader of this card-making site.
My Other Websites
Copyright © 2004-2024 Flora Grace | Making-Greeting-Cards.com (aka HeartInCard.com ) | All rights reserved.
Making-Greeting-Cards.com has affiliate partnerships and may earn commission on products purchased through affiliate links. These partnerships do not influence our editorial content. Making-Greeting-Cards.com does not sell any personal information.
New! Comments
Have your say about what you just read! Leave me a comment in the box below.