- Home
- Birthday Cards
- Holiday Cards
Handmade Holiday Cards
Made More Spectacular with 3D Effects and Copic Markers
Handmade holiday cards should be spectacular. Since they are made by hands, they can be as elaborate and with as much details as we want them to be.
With the help of die-cut and embossing machines for hobbyists, art rubber stamps and a bit of imagination, we can create one-of-a-kind handmade holiday greeting cards that will wow our relatives, friends and associates.
Handmade Holiday Cards #1

This is one of the holiday greeting cards I created. "Decorate the Season with Kindness and Love" is made in an afternoon when I just need to take a break and relax. Cardmaking is indeed a relaxing hobby and I feel so much calm and cool :-) after a session of making greeting cards. No reason why I can't create Christmas cards in January, right? Can always keep them as a sample design card when it's time to design and make my year end handmade holidays cards.
Card Making Supplies Used for Handmade Holiday Cards #1
- deep christmas red color cardstock 12" x 6"
- christmas green polka dots cardstock 5.5/8" x 5.5/8"
- cream or white color cardstock 6" x 6"
- rubber stamp - Penny Black 'Decorate the Season'
- cricut embossing folder - christmas lights
- copic markers or other coloring media
- black ink pad
- paper trimmer
- scissors
- gold ribbon
- double-sided foam tape
- glitter glue
- glue
Card Making Instructions
- Score and fold red color cardstock to make a blank square 6" x 6" folded card.
- Punch corners with rounder punch and put aside.
- Use a corner rounder punch on the green cardstock also.
- Stamp Penny Black's Decorate the Season rubber stamp with black ink on white or cream cardstock.
- Color with copic markers. You can also use water color or colored pencils.
- Trim around image. Refer to photo above.
- Dry embossed christmas lights on both sides of a 5.5/8" x 2" strip of white or cream cardstock.
- Trim and color.
- Attach a piece of gold ribbon in the middle of the dry embossed strip of cardstock with glue.
- Glue the stripe on the left side of the green polka dots cardstock.
- Attach stamped and colored images on the green polka dots card stock with double-sided foam tape for a 3D effect.
- Highlight image with glitter glue. Leave to dry
- Layer with glue on top of the red folded card.
Handmade Holiday Cards #2

The above is another card created just to spend some alone time. It looks like it had been haphazardly put together. Maybe! Maybe not! It does has that raw imperfect look, right? One, it could be because I was too lazy to go hunt for my circle cutter / circle die. That's for having too many card-making supplies.
Card Making Supplies Used for Handmade Holiday Cards #2
Celebrating a birthday in December? Look at these Holiday Birthday Cards.
- deep Christmas red colour cardstock 8" x 6"
- cream colour cardstock 3.7/8" x 5.7/8"
- cream colour cardstock scraps
- clear stamps by Penny Black
- background embossing folder
- label die cut and emboss folder
- color markers or other coloring media
- pine green ink pad
- paper trimmer
- scissors
- sponge
- double-sided foam tape
- glossy accents
- glue
Card Making Instructions
- Score and fold red colour cardstock to make a blank 4" x 6" folded card.
- Dry embossed background on cream 3.7/8" x 5.7/8" cardstock.
- Layer on top of folded red card with glue.
- Stamp Penny Black's clear stamp with pine green ink on cream cardstock scrap.
- Colour with colour markers. You can also use water colour or coloured pencils.
- Trim around image. Refer to photo above.
- Cut a circle with another piece of cream cardstock and edged with pine green ink with a sponge.
- Attach trimmed stamped image to green edged circle with double-sided foam tape.
- Layer on top of dry embossed background cream card.
- Die cut label on cream cardstock and dry embossed.
- Stamp Christmas greetings with pine green ink on label.
- Sponge pine green ink and dab lightly over embossed area and edges of label.
- Layer on top of dry embossed background cream card just below the circle image. Refer to photo for placement.
- Embellished with glossy accents on cherries and ornaments in stamped image.
That's it! Two handmade holiday cards to 'wow' your friends. Handwrite a personalised christmas greetings inside the card and send it to someone special this festive season.
You might like these
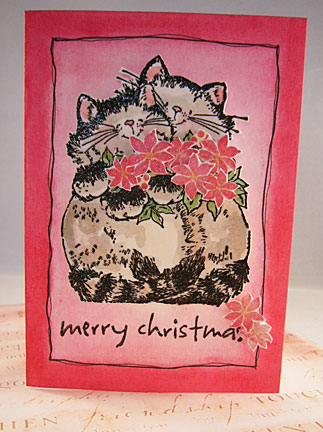
Cat Christmas Cards - Animal Christmas Card Ideas
These cat Christmas cards are part of an animal Christmas card design collection.
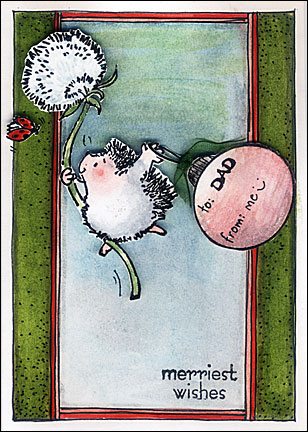
Christmas Card to Father? DIY Projects
A Christmas card to father made by you is absolutely cool. A DIY card is definitely received with awe and delight.
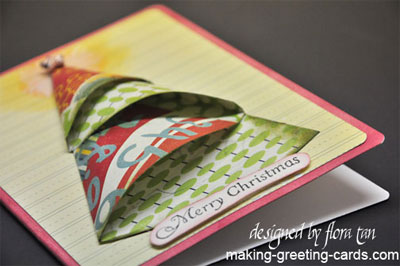
Bright Origami Christmas Tree Card - Template and Instuctions Provided
Fold this origami Christmas tree card with double-side printed scrapbooking paper. Use the origami tree template provided and make this delightfully origami card.
Like This Site?
|
| |
Celebrating Creativity! Connecting Lives!
~ bringing cheer one card at a time.
Help Me Get The Word Out

If you like making greeting cards and want to encourage others to do so because of its many benefits, please help me share this website with your friends. Just click on the share buttons below to share with your fans and friends. Thank you for sharing the good things in life :-)

Hi! Welcome to my card-making website. My name is Flora Grace and I'm an avid crafter and love creating stuff with paper.
I love to connect with you so do sign up for my e-newsletter which is totally free and receive fresh news every month.
Recent Articles
-
Shaped Birthday Greeting Cards Are So Fun and Unique
Aug 01, 23 01:41 AM
 Let's make Birthday greeting cards in various shapes. Why just a regular card? Make it fun with all kinds of shapes for your diy birthday cards or invitation cards. These birthday fun cards are great…
 -
Cards Verses for Your Greeting Cards
May 15, 23 05:10 AM
 List of cards verses for all occasions. Need words, quotes or poems? Free wordings to use for your greeting cards.
 -
Heartfelt Birthday Wishes for Friends and Family
May 15, 23 05:04 AM
 Birthday wishes for friends and family to include in your birthday cards.
 -
Other Card Makers And Their Handmade Cards
Oct 08, 21 01:16 AM
So many card makers have sent in their handmade cards. View their creations and be inspired by their card making style and techniques. -
Barbara Phelps 4 - Fourth Page of Handmade Cards
Oct 08, 21 12:04 AM
 Barbara Phelps 4 is the fourth page of beautiful handmade cards personally created by Barb, a creative crafter and reader of this card-making site.
My Other Websites
Copyright © 2004-2024 Flora Grace | Making-Greeting-Cards.com (aka HeartInCard.com ) | All rights reserved.
Making-Greeting-Cards.com has affiliate partnerships and may earn commission on products purchased through affiliate links. These partnerships do not influence our editorial content. Making-Greeting-Cards.com does not sell any personal information.
New! Comments
Have your say about what you just read! Leave me a comment in the box below.